Thursday, February 26, 2015

The Simplest Side Dish You'll Ever Make... and One of the Tastiest

Two Ingredient Rice Au Gratin 

If you haven't figured out that quick and easy, yet homemade from real-food ingredients is the rule of the kitchen and cuisine here at Potluck Paradise headquarters, we've not been doing our job very well.  We'd almost always rather eat something we've made than pull a microwave dish from the freezer or even go out to eat. 

When we're in a hurry we take most of our inspiration from what's in the cupboard, freezer, or fridge and we frequently fall back on the time-tested dishes we've found in our research into foods prepared and loved in kitchens dating back to the 1820s. 

We fell in love with this two-ingredient dish from the wheat and potato saving days of World War I. Back then rice was an uncommon ingredient in Midwestern kitchens. The home economics faculty members at the University of Minnesota were charged with finding ways to help homemakers "win the war with food."  They published a number of recipes. This simple dish was among them. It has a feel of macaroni and cheese, without the bother of boiling the macaroni and cooking up the cheese-laden white sauce. 

It couldn't be easier. Leftover rice and grated cheese. And a microwave... or you could use the oven. 

Rice Au Gratin

1 cup leftover rice -- we like brown rice
2 ounces grated cheese -- we like cheddar cheese 

The key to success is to have the rice in a layer not more than an inch thick.  Pat into a lightly greased  microwave safe pan. Sprinkle with cheese and microwave on medium until the cheese melts. 

Easy to increase -- using 2 ounces of cheese for each cup of rice. 


Copyright 2015 Rae Katherine Eighmey. All rights reserved.

Tuesday, February 24, 2015

Two Tablespoons of Butter Convert Leftover Bits of "This and That" into Gourmet-Worthy Dinner


Herb Butter: 
Sauted onions, garlic, and celery with dried basil and diced parsley 

If you've been following our February is National Potluck Month posts you may be thinking, "I've seen this dish before.  Actually, I saw it yesterday."  

Well, you'd be right. You can scroll down to the previous post to find the simple recipe.This was not the story I planned to tell today, but I discovered with delight that making the herb butter yesterday enabled me to get dinner on the table today in ten minutes. 

We'd had a larger lunch than normal and so I thought we might just skip supper. But then we both got a bit peckish. I started rummaging about in the fridge and bumped into two small zucchini.  I could saute them in some of the herb butter. So I sliced them and tossed them into a skillet with the butter and cooked over medium heat for a few minutes and then lowered the heat and put on the lid. Needed more than just the zucchini, so I pulled out the last little bit of ham.  I had thought I'd chop and make it into a sandwich spread. Instead, I sliced it thinly and tossed it into the zucchini.  One more look in the fridge uncovered the last bits of asparagus -- maybe ten thin spears that had been "just too much" for dinner two nights ago. So into the skillet they went, too. 

The entire dish cooked in less than ten minutes. With some bread and a bit of cole slaw made for the sack of cabbage and bottled dressing, we had a fine meal. 

But we didn't eat it all. There is enough left to be combined with a couple of eggs to make a free-form omelet for lunch tomorrow. 

All made possible with a bit of herb butter that had just the right flavors to unite and elevate the simple leftovers into a delightful dinner. 

I don't know what is more Potluck Paradise Perfect than that!

Monday, February 23, 2015

Great Spice Blends Created Nearly 100 Years Apart Easily Enhance Meats and Vegetables

Spices blend following an 1857 recipe
pepper, dry mustard, cinnamon, cloves, and nutmeg

When we were doing research into recipes from the 1850s, 60's and 70s, we encountered a number of articles in cookbooks, and farming or women's magazines of the day offering up spice blends. These home concocted mixes of seasonings are often a fusion of herb and spice. Some featured dried herbs as well as ground spices. All of them lend a delicious difference to pots of soup, sauces, or as with the spice blend below to "forcemeats and gravy."

A forcement is a kind of small meatball with crumbs of buttered bread bound together with beaten egg. Victorian soups weren't complete unless they had a couple of forcemeat balls leading a savory spiciness to rich broth.  Well, here at Potluck Paradise headquarters we're not often into dusting off the soup tureen, but we have found that forcemeat makes a nice stuffing for broiled mushroom caps or they are quite tasty by themselves as a small appetizer meatball.

When we were studying kitchens and homemaking during the 1950s, we found other kinds of blends to dress up cooked vegetables. Here, busy cooks seeking to add a bit of elegance to fresh or canned vegetables could toss the pound of carrots with a quarter of a cup of mint jelly. Or they could cook up this compound butter to toss with green beans, asparagus, or other green vegetable.  Once made, it is easy to keep on hand in the refrigerator for a couple of days or in the freezer for weeks. Freeze it in a flat container and then you can easily slice off a gold and green "bar" to toss into the drained vegetables.


1857 Herb Blend for Forcemeat and Gravy

1/2 cup ground black pepper
1/4 cup ground ginger
1/4 cup ground nutmeg
1/4 cup ground cinnamon
1/8 cup cloves

Mix the spices in a container and store in a dry place. When ready to use add a half teaspoon to a cup of gravy. For making meatballs with a pound of meat, start with 1/2 teaspoon for mild and 1 teaspoon for strong flavor.


1950s Herb Butter Blend

1 stick butter
1/4 cup minced celery
3/4 cup minced onion
1 clove of garlic, minced
1/4 teaspoon dried basel
1/4 cup minced fresh parsley

Melt the butter in a medium frying pan. Add the celery and onion and cook about five minutes until the onion is transparent. Add the remaining ingredients, lower heat and cover. Cook for ten minutes, stirring from time to time.  Store in refrigerator of freezer. Use about a tablespoon to a serving of vegetables.


The Two-Quart Glass Bowl -- Potluck and Cooking Essential


Here at Potluck Paradise headquarters our favorite piece of cooking equipment is our classic Pyrex casserole dish.

We actually have several.  We picked up the one in the picture in the 1980s when we were toting loads of food to potlucks. We have a couple of smaller ones in fashionable smoked-looking glass. We even have one from our mother's kitchen back in the 1960s. We use them for basic casserole making--scalloped potatoes, tater tot hot dish, corn and tomato casserole. We use them to microwave leftovers. 

They are also the perfect thing to cook broccoli and cauliflower in the microwave. Break up into pieces, put a bit of water in the bowl, cover and microwave on medium until done. Again, one of our multi-tasking tricks. No need to stand around in the kitchen watching a pot on the stove when there are loads of other things to do around the house. 

These versatile dishes can stand in as a mixing bowl or even a rustic centerpiece. Just don't use them to cook on top of the stove!!

Our "February is National Potluck Month 2015" is coming to an end.

We've covered a fair amount of ground during these three weeks. We've offered up desserts and treats, non-alcoholic beverages, main dishes that are inexpensive and darn tasty, and offered some thoughts for getting the most from your cooking endeavors. 

During this last week we'll have some more quick ideas for spiffing up leftovers and meals, a take on a classic dish everyone loves, and a totally magic cake.  

Thanks for coming along with us.  As we like to say here at headquarters: 
"Potluck Paradise -- It's a book!  It's a blog! It's a state of mind!"

Sunday, February 22, 2015

Turning Dessert into Veggie Side Dish-- Hint from a Well-Stocked Freezer


So we're seriously patting ourselves on the back over this genius insight here at Potluck Paradise headquarters. We sang the praises of our quick-from-the-freezer Apple Crisp earlier in the month (February 11 to be exact -- you can link from the blog topic below in the right column)

We do really love this dessert, but lately thoughts of pending swimsuit season have had us skipping treats as an unnecessary added course.  So what were we to do with the 37 bags of quick pie filling taking up space in the freezer?  Sure, it will be some months before we have fresh, local, picked-from-the-orchard pie apples and working in the garden will burn off calories so we can indulge again. Maybe there was a way to use some of them up.

And then... we spied the two small sweet potatoes in the veggie bin, hardly a serving and a half between them. Apples and sweet potatoes are a great combination.  So we quickly peeled, diced, and steamed in the microwave. Then cooked the pie filling in the microwave as well and tossed the two together. Some pecan bits on top!  A superior side dish in a microwave minute -- or ten.

We had converted those two potatoes and pie filling into at least four servings. Not bad.

Friday, February 20, 2015

Low Salt "Soup-er" Pot Roast


There's nothing better than pot roast fresh from the oven . . . unless it is smelling the pot roast cooking all afternoon knowing there will be a wonderful dinner without much effort. OR wait. .. wait... the thought of the amazing leftovers you'll have for a couple more meals--maybe another dinner, or a couple of great hot roast beef sandwiches for lunch. That's why we always buy a five or six pound roast to cook here in Potluck Paradise headquarters. Sure you can make this with a two or three pounder, but it doesn't take that much longer to cook for delicious extras.  Potluck perfection!

Years ago we made this classic pot roast simply seasoned with canned and dry soup and wrapped up in foil a couple of times a month here at Potluck Paradise headquarters. But then we got concerned about too much salt in our food, so we just stopped. Every once in a while, we'd think about making it, but the idea of close to a day's worth of salt in a single serving made us shove the recipe back in the box.

But food makers have gotten hep. It is now possible to buy low and no salt soups. And if you can't find them where you live, we've found a couple of tricks.

Souper Pot Roast

1 4 to 5-pound chuck roast
2 cans condensed cream of mushroom soup -- low sodium
2 envelopes dry onion soup mix -- low sodium
 OR if you can't find low sodium sift the soup mix through a sieve
        capturing the dry onions and saving the salty seasoning part
        in a small bowl.   And have an envelope of non-sodium beef broth
1/2 cup water
1/2 cup red wine

Preheat the oven to 300 degrees F.  Line a baking pan with heavy duty aluminum foil allowing enough to wrap totally around the meat. Put the meat on the foil. Sprinkle evenly with the low sodium onion soup mix (OR the onions only from the full sodium version and a pinch or two of the sifted out seasoning and one envelope of the non-sodium beef broth mix) Spoon the mushroom soup over the top of the meat. Pour water and wine around the edges.  Seal the foil tightly.  Bake until done, about 3 to 4 hours depending on the size of the roast.
To serve: put the meat on a platter and stir the juices remaining in the pan to make a rich gravy.

Thursday, February 19, 2015

Egg and Rice Omelet--A Potluck Paradise Vegetarian Favorite for Lent


From time to time our attention shifts to options for meatless meals here at Potluck Paradise headquarters.  And as Lent starts during this National Month of Potluck celebrating, we thought we'd share this recipe that deliciously combines leftover rice and stretches just 2, count 'em TWO eggs and topped with a bit of cheese sauce to make a very filling and delicious dish for two 

We found the original recipe in the March 1911 edition of the Boston Cooking School Magazine. It looked tempting, but it looked even more tempting when we realized that we had a cup of so of cooked rice in the fridge that we didn't quite know what we were going to do with it. 

Presto! a solution.... and lunch. 

Rice Omelet with Cheese Sauce 

2 eggs, separated
1 cup cooked brown rice, at room temperature
1 tablespoon water
a couple of grinds black pepper
dash salt, optional
1 tablespoon butter

About the pan and cooking method. I used my calphalon 8-inch omelet pan and it worked very well. The sides on the pan slope from a 5 1/2-inch base to a 7 1/2-inch inside diameter top. The original 1911 recipe says to finish cooking the omelet in the oven. I opted for a simpler method and just put a lid over it until it set.  The trick of stovetop cooking is to make sure the heat is low enough at this point that the bottom doesn't urn while you are waiting for the center to finish cooking. 

Instructions 
In a small mixing bowl beat the egg whites until they form soft peaks and set aside. In a medium mixing bowl lightly beat the egg yolks with salt, pepper, and water. Stir in the rice and mix well until all the grains are separated and coated with the yolk mixture. Gently fold the egg whites into the rice mixture. Melt the butter in omelet pan and swirl it up around the sides. Spoon the mixture into the pan and cook first over medium heat and then, once the bottom has set, continue on low heat, covering the pan with a lid, or putting it into a pre-heated 350 degree oven until the middle is set. 

To serve
Make a shallow cut through the omelet, cutting at the one-third mark. Pour cheese sauce over the larger area and then carefully fold the remaining third over the top. And then, with another carefully, remove to the plate. 

This is simple and elegant, in a homespun way. The crust is crispy and the filling surprisingly light. I made the cheese sauce with cheddar cheese. Swiss would be nice with some sauted mushrooms on the side. 

Cheese Sauce

2 tablespoons butter
2 tablespoons flour
1 cup milk
1/2 cup grated cheese -- more or less to taste

In a small saucepan, melt the butter and then stir in the flour. Cook over medium heat for a couple of minutes, stirring frequently, so that the flour begins to cook, but doesn't brown. Gradually add the milk and continue cooking and stirring until the sauce thickens. Stir in the cheese.  Leftover sauce can be refrigerated for a week, or stored in the freezer for a month.  

Wednesday, February 18, 2015

Enjoy Chinese New Year on Throwback Thursday With Chow Mein 1950s Style

We remember the 1950s--just barely--here at Potluck Paradise headquarters. In the midwestern small towns where we spent most of our young lives, the exciting, exotic foods of big city international cuisine were a dream from the pages of Gourmet magazine, or the ads in Life and Look.

But that didn't mean our mothers stopped trying for the exotic. Back before there was a pizza parlor on every corner and refrigerators had a freezer inside the main compartment that was the size of a shoebox, our clever mothers enlisted help from Chef Boyardee and La Choy to bring something different and tasty to the table.

Not for them just the simple opening of a can--magic and wonderful though its ingredients might be! No they did more than that. This Chow Mein recipe was refined over many versions. In the end it is the perfect fusion of Midwest with Far East. We hope you enjoy this throwback to the 50s flavor.  For a true taste contrast, pick up some modern frozen egg rolls as an appetizer. It is quite an experience.

1950s Chow Mein

1 tablespoon butter
1 1/2 cups celery, decoratively sliced on the diagonal
8 ounces fresh mushrooms, caps cut in half or quarters depending on the size
1 1/4 cups low salt chicken broth ( a 10.5 ounce can)
1 1/2 tablespoons corn starch
1 1/2 cups diced cooked chicken breast
1 can chop suey vegetables, drained
1 can fancy Chinese vegetables, drained
1 can chow mein noodles
soy sauce, to taste

No one in the Midwestern small towns we lived in had a wok.  So it is the frying pan that steps in to create the magic.

Melt the butter in a large frying pan. Add the celery, mushrooms and 1/4 cup of the chicken broth. Cover and cook over low heat, stirring occasionally, until the celery is just tender. While this is cooking, stir the corn starch into the remaining chicken broth and set aside. Add the cooked chicken to the frying pan and heat through. Add the broth and corn starch mixture and cook over medium heat until the pan juices are thickened. Add the vegetables and heat through. Add soy sauce, if desired. To serve, put the cooked Chow Mein on a large plate and surround with the crispy noodles.

Serves 4 to 6.

May the Year of the Goat find your path lined with primroses, carnations, and good luck.


Monday, February 16, 2015

Potluck Perfect and a Salvation for a Snowy Day -- Ice Cream for Breakfast Day


George Washington Ice Cream -- Cherry Delicious

What could be more perfect -- tomorrow is Ice Cream for Breakfast Day?

According to the Ice Cream for Breakfast Day official website, the "best holiday you just discovered" started Florence J. Rappaport's Rochester, New York, kitchen in 1966. Florence decided to distract the youngest two of her six children on a day when there was "nothing to do" because of the snow and cold by declaring it was.... you guessed ... a day when you could eat ice cream for breakfast.

The children and other relatives introduced people all around the world to this delicious notion. 

Here at Potluck Paradise headquarters we're taking a page from our sister blog on soda fountains and Prohibition--Soda Shop Salvation and sharing one of our favorite homemade ice cream recipes.  It is perfect for this holiday-crammed month of February as it celebrates George Washington whose actual birthday in February 22. 

You'll find recipes for tasty sodas, wonderful sundaes and a great, rich ice cream topping along with other soda fountain favorites at http://sodashopsalvation.blogspot.com/

But before you toodle over there, spend some time with this great recipe.  Better than pie, which, of course, we often eat for breakfast, too. 

George Washington Ice Cream
1 1/2 teaspoons powdered unflavored gelatin (Knox brand)
1/4 cup cold water
1 (10-ounce) jar maraschino cherries, including the juice
1 1/2 cups milk, approximately
1 3/4 cups sugar
1/2 cups cherry juice, bottled or frozen
1 1/2 cups half-and-half

In a small bowl, sprinkle the gelatin over the cold water and let it stand until softened. Drain the maraschino cherries, putting the juice into a glass 2-cup measuring cup. Coarsely chop the cherries and set aside. Add milk to the maraschino cherry juice to make 2 cups. Place the juice and milk mixture into a medium saucepan and add the sugar. Cook over low heat, stirring from time to time, until the sugar has dissolved. remove from heat and stir in the softened gelatin. add the remaining cherry juice and half-and-half, and then stir in the chopped cherries. Chill the mixture and then freeze following the directions of your ice cream mixer. It will come out of the machine as as "soft serve" mixture. Spoon into containers with tight-fitting lids and store in the freezer for an hour or two until it fully hardens.


Sunday, February 15, 2015

In a Pickle? Relish your Dinner!


We've all been there.  The end of dinner and we're stuck with the last half cup of vegetables...served, but uneaten. Most can just be bagged up and put into the freezer "soup store."  After all there's hardly a meat or vegetable soup that wouldn't benefit from some extra corn, green beans, peas or even asparagus.  Some would go nicely in a pureed cream soup--again, asparagus and peas, but also spinach, kale, or brussels sprouts.

But then there are beets!

Here at Potluck Paradise headquarters we love beets. We frequently buy a dozen or more, trim off the tops and put them in a foil-lined large baking pan. Add about 1/2 cup of water and seal the foil around them.  Depending on the size, an hour or two in a 350 oven and the skins come right off the fully-flavored red or golden globes.

Leftover beets present their own delicious opportunities!

One of our favorites is the Quick No-Salt Pickle.  We've done this pickling technique for years in the summer Mixed Canned Vegetable Salad--you know the one--a can each of corn, peas, French-cut green beans, kidney beans, and any other kind of bean you like. Drain and rinse and then pour over the boiling hot liquid made from equal parts sugar and white vinegar! Let stand until cool. Refrigerate overnight if you want to make ahead. Keeps for a week. Yum!

So the technique is the same

Picked Leftover Vegetable Relish

For each cup of leftover cooked vegetables such as:
Beets
Carrots
Peas
Green Beans
Asparagus
Corn
Brussels Sprouts
maybe even Turnips and Parsnips

1/3 cup white vinegar, you could use cider if you prefer
1/3 cup white sugar

1/4 to 1/2 teaspoon dried seasonings such as: cumin, dill seed, dill weed, mustard seed, celery seed
More of fresh seasonings such as dill weed

Rinse the cooked vegetable to remove any butter or other sauce you may have put on them when you served them for dinner. Cut them into uniform small size, if necessary. Put the vegetables into a heat-proof bowl and add seasonings if you wish.  Combine the vinegar and sugar in a small pot and gradually bring to a boil, stirring until the sugar is dissolved. Pour this pickle over the vegetables and stir from time to time as they cool.  Store in the refrigerator for three or four days.

So tasty, no one would even think they were leftovers!

Friday, February 13, 2015

Celebrate with the Delicious Mardi Gras Drinks --Non-Alcoholic, Too


Prohibition Sour  "A Drink for Men"

Celebrate Mardi Gras in style with these throw-back drinks from the Prohibition Era. Tasty and easy-to-make, they are a far cry from what we call in the Midwest "pop" and everyone else calls "soda."

During the thirteen years of Prohibition from the sales, manufacture, and transport of alcoholic beverages some folks turned to boot-leg beverages made in bathtub or basement stills. Some folks gave the "high sign" and slouched into dark speakeasys.  Others discovered the joys of tasty beverages and super ice cream sodas and sundaes made before their eyes in sparkling bright soda fountains--some even occupying remodeled saloons.

Keep a bottle of homemade flavor concentrate in your refrigerator or freezer and mix with purchased carbonated water or in one of those new-fangled "Soda Stream" machines. You and your guests will be refreshed before you can say "Al Capone."


Simple Syrup Based Flavor Concentrates

Let's start with the flavor concentrates -- and they all start with Simple Syrup.. Which is as simple as it's name suggests.

Simple Syrup

1 cup water
1 cup white granulated sugar

Put the water into a medium pot. Gradually add the sugar. Warm over low heat, stirring gently until the sugar dissolved. Do not even bring to a simmer. Just heat it enough to encourage the sugar to dissolve.  That's it!  Simple syrup keeps for days in the refrigerator.

Lemon, Lime, Orange Flavored Syrup

1/4 cup simple syrup
1 tablespoon frozen concentrated juice mix, such as lemonade, limeade, or orange juice

Stir the concentrate into the syrup. Use immediately, or store in the refrigerator for two or three days, or in the freezer for longer.  NOTE: you can use any frozen concentrate.  You can also make flavor concentrates by mixing actual fruit juices with the simple syrup or infusing the syrup with fruit peels, ginger root, and other ingredients. This is just faster and easier. And that's what we like here at Potluck Paradise -- tasty, easy, and fast.


Minnehaha Maid -- invented in Minnesota 

Minnehaha Maid

Makes enough to flavor about 2 liters of carbonated water 
or 16 5-ounce servings

1/2 cup cranberry juice
1/2 cup white grape juice 
1/2 cup lemon syrup
1/2 cup simple syrup (recipe above)

Combine the syrups. Use one ounce to a 7-ounce glass. Add a small scoop of crushed ice and about 4 ounces of carbonated water. Finish with a twist of lemon.

Prohibition Sour

Enough for three liters of carbonated water
Or 12 7-ounce servings

1 1/2 cups lemon syrup
3/4 cup orange syrup
juice from 6 limes

Mix the syrups and lime juice together. Use 1 1/2 ounces syrup to an 8-ounce glass. Add small scoop of crushed ice and 6 ounces of carbonated water. Finish with a slice of lime


Wednesday, February 11, 2015

Stop Browning Beef !-- A Culinary Confession


I must confess.  It is a heresy here at Potluck Paradise headquarters, but I hate browning ground beef. Worse yet, ground beef and onions. I just have no patience for standing over the stove  for ten or fifteen minutes and mashing the bits of beef into smaller bits, shuffling them around the pan until they are all browned and ready for the next step in casserole, hot dish, or sauce making. And then there is the grease to get rid of.

There I've said it!

But I'm not going to hang up my apron.  I've discovered a better way to manage beef for even tastier dishes.  I make extra hamburgers every time I fire up the grill.  It doesn't take that much extra time. The cooked burgers fit nicely into the freezer and when I'm ready to make a browned beef dish, I just crumble the burger into it and off we go. They add a nice grilled flavor to the dishes. And I usually mix chunky-style salsa into the beef before I form the patties, so I get that nice cooked onion in there, too. I usually add about 8 ounces of salsa to 5 pounds of beef and get about four burgers to the pound. Very handy to have on hand for a quick version of the Midwestern favorite

Hamburger Goulash

1 8-ounce package elbow macaroni, cooked and drained

8 ounces ground beef
1 medium onion, diced
1 green pepper, diced

OR instead of the beef, onion, and pepper use
3 grilled hamburger and salsa patties, crumbled

1 24-ounce can tomato juice
6 ounces cheddar or American cheese, cubed

Preheat the oven to 325 degrees F. Lightly grease a 12 x 9-inch baking dish. If using the ground beef, onion and pepper--begin by browning the beef in a large skillet over medium heat. Add the onion and pepper and cooke, stirring until the beef is brown, the onion is transparent and the pepper is slightly cooked. Follow directions below.

If using my ever-so-sensible method of grilled beef just put all the ingredients into the baking dish and stir gently to make sure the ingredients are evenly distributed. Cover with foil and bake until the tomato juice is mostly absorbed by the macaroni and the cheese is melted, about 30 minutes. Stir once during cooking.

Serves 4 to 6 or 2 famished teen-aged boys

Copyright 2015 Rae Katherine Eighmey. All rights reserved. 

Nearly Instant Apple Crisp--Potluck Dream


It's hard to beat an apple crisp warm from the oven. Sweet and tart with just enough crispness in the crumbled topping to make a delicious end to supper. But here at Potluck Paradise headquarters we devised a way so that this tasty delight can be had easily for a quick breakfast or even a midnight snack.

It all began in typical potluck fashion with a gift of a bunch of apples. Our friend Michele's apple trees were in fine production last fall. When she asked if we could use some cooking apples of various kinds, we had visions of a pie or two, some sauce, a bit of preserves.  We did all of that. Set some by in the freezer and on the preserve shelf. . . but there were still more apples. Michele had done her own canning and freezing and said that she could feed the rest to her horses. But never one to turn away from a challenge, or the gift of free apples, we said that we would keep finding ways to use them.

And so we have the Nearly Instant Apple Crisp Filling.  It took a bit of tinkering to develop the recipe. And a bit of time to work through the apples to get them set up. Really it is just a matter of peeling, slicing, mixing, measuring, and filling the freezer bags--you could work through a couple of pecks of apples while watching your favorite team win its Saturday college football game. These little packets of great filling tuck nicely into the freezer and are ready to eat in less than 10 minutes.

Nearly Instant Apple Crisp

Cutting the apples:
The most important thing is to cut your apples into pieces that will cook quickly in the microwave when you are ready to make the crisp. We've found slices roughly an inch square and 1/2 inch thick work well, No need to be precise, you and your knife will get the idea. We generally peel and cut the apples in quarters and then remove the core. Then cut these quartered apples into thin slices.  Large apples should be cut into six pieces or even eight.

To make the filling:
6 cups apple slices (see important note above)
3/4 cup sugar -- we prefer brown sugar, but you can use white
1 tablespoon cornstarch
1/2 teaspoon vanilla

We've found it is really easy to mix this filling in an 8-cup clear Pyrex measuring cup. Put in the apples, pressing them down for a good measure, followed by the sugar, and cornstarch. Mix well and stir in vanilla.  Divide the filling into ten packets. We found plastic sandwich bags worked well. Roll tightly or flatten for compact storage in the freezer. We put the sandwich bags into larger freezer bags for better protection against freezer burn.

Now for the topping--you can make this easy recipe below, or just crumble cookies, granola, or buttered bread crumbs on top.

To make the topping:
1 cup brown sugar
1 cup Old Fashioned oatmeal, uncooked
3/4 cup flour
1/2 cup cold butter, cut into chunks

In a medium mixing bowl combine the brown sugar, oatmeal, and flour. Using a pastry cutter or two knives, cut the butter into the dry ingredients until it looks like coarse cornmeal.  Divide into ten packets and freeze.

To make a crisp:
Empty the contents of an apple packet into a 2-cup Pyrex measuring cup. Microwave at a medium setting until warm and the sauce has thickened, about 4 minutes. Be sure to stir once or twice during the process.

Pour the filling into an oven-proof bowl and sprinkle with some of the topping--straight from the freezer will work. Finish by putting under a low broiler -- about 8 inches away -- for just a minute or two. Or in a preheated 350 degree oven, or in a toaster oven.  Watch carefully so that the topping doesn't burn.

There you go!

Copyright 2015 Rae Katherine Eighmey. All rights reserved


Tuesday, February 10, 2015

Low-Salt and Delicious -- Sweet and Spicy Crackers Abraham Lincoln Might Have Enjoyed

Part of what we do here at Potluck Paradise is to research and write about old recipes.  I've written six books that are a fusion of history and food. Abraham Lincoln in the Kitchen is my newest. This recipe is from that book and is one of the absolute favorites in our kitchen and wherever we have served these unusual treats.

These are kind of like cookies. They are sort of like crackers. They are absolutely delicious and ridiculously easy to make. And, once made, they keep for days, even weeks, if you can stop eating them.

They are called APees.  Pronounced "A Peas" not aps.  And they date way, way back. I've made them for years, first finding the recipe in a Civil War-era cookbook. I was thrilled to find a recipe for them in the newspaper Abraham Lincoln would have been reading in New Salem, Illinois, in November of 1833.

I don't think store-keeper Lincoln would have made these himself. He was sleeping on the counter of his store and taking his meals with families in town or at the Rutledge Tavern. Ann, the daughter of tavern keeper and New Salem founder James Rutledge, was said to have been Abraham Lincoln's first true love. They were, at the very least, good friends and mutually devoted to learning. Neighbors recounted seeing them together, often with their heads bent over books.

Lincoln was elected to his first term in the Illinois Legislature in 1834 and the Rutledge family sold the tavern and moved to a nearby farm. Ann made plans to enroll at Illinois College in the town of Jacksonville the following year. However in August 1835 Ann became ill, probably with typhoid fever. Lincoln rode to visit her for what the family feared would be one last time. The two spent an hour alone together as the grieving Abraham sat by her bedside. She died two days later. She was just 22 years old.

Lincoln was said to have become deeply saddened and seen to be wrapped in profound thought as he walked around town and in the surrounding woods. Years later, as Lincoln was leaving Springfield for the White House an old New Salem friend asked Lincoln about Ann. Lincoln is said to have replied, "I did honestly & truly love the girl."

These delightful treats are memorable, too.

 APees   -- adapted from an 1833 recipe

2 cups flour
1/2 cup sugar
3/4 teaspoon cinnamon
3/4 teaspoon nutmeg
3/4 teaspoon mace
1 1/2 tablespoons caraway seeds
1/2 cup (1 stick) cold, salted, or unsalted, butter
1/3 cup white wine

Preheat the oven to 350 degrees F. Combine the flour, sugar, spices and the 1 1/2 tablespoons of caraway seeds in a mixing bowl, or in your food processor. Slice the butter into small chunks and cut into the flour mixture with a pasty cutter, two knives, or using the food processor, until the mixture looks like coarse cornmeal. Mix in the wine with a fork or the processor and knead until you have a smooth dough. Roll out on a lightly floured surface about 1/8-inch thick. Prick all over with a fork and cut into squares with a rotary jagging iron or just a knife. Place on lightly greased sheets and bake until light brown, about 20 to 25 minutes. The Apees shrink as they bake.  Makes about 7 dozen small cookies.

Note: these are great to eat all by themselves, but are particularly tasty -- and unusual -- as a base for cheese, spreads--ham would be great, or a bit of cream cheese and homemade apple preserves--see our recipe for February 2!


Copyright 2015 Rae Katherine Eighmey. All rights reserved.

Monday, February 9, 2015

Celebrate Honest Abe's Birthday with His Gingerbread Men


This Wednesday, February 12, will mark 206 years since Abraham Lincoln was born on his family's farm in Kentucky.  The family lived there until Abe was nearly eight, moving to homestead in wild southern Indiana. Lincoln later wrote a poem in which he described those early Hoosier settlement days. One stanza says:

When first my father settled here, 
'Twas then the frontier line:
The Panther's scream, filled the night with fear
And bears preyed on the swine.

Among the young boy's favorite treats were these gingerbread men, made either by his mother Nancy who died when Abraham was nine, or by his step-mother Sarah. Lincoln described these soft cookies several times, almost giving a recipe. When he was in the White House President Lincoln told the story about those men describing the two key ingredients--sorghum and ginger--and the texture, being able to eat one quickly in two bites.

Lincoln had first used the homey anecdote to great advantage during the Lincoln-Douglas debates when he diffused the excessive and insincere praised heaped upon him by the "Little Giant" Senator Douglas. The tall, eloquent lawyer from Springfield allowed as how he was like his poor neighbor "Hoosier boy" back in Indiana who loved gingerbread more than anyone and never got any. Lincoln said that he was so unaccustomed to praise that he forgot to get angry even at the misrepresentations Douglas had insinuated within it.

Abraham Lincoln won the hearts and the humanity of the audience that day, even though he lost the election. It was the second and last one he would ever lose in his long political career in the Illinois Statehouse, United States' Congress, and the Presidency.

These easy-to-make treats will win your hearts, too. Perfect to make with children or grandchildren and celebrate Lincoln's birthday or President's day in two weeks.

Abraham Lincoln's Gingerbread Men

1/2 cup milk
1/2 cup sorghum syrup, you may use light or dark molasses
3 1/3 cups flour
2 tablespoons packed brown sugar
1/2 teaspoon baking soda
1 tablespoon ground ginger
1/2 cup (1 stick) cold salted butter

Preheat the oven to 325 degrees. Lightly grease two baking sheets. Pour the milk into a glass measuring cup and add the sorghum. Stir to mix. In a medium mixing bowl combine the flour, brown sugar, baking soda and ginger. Slice the butter into small pieces and cut into the flour mixture with a pastry cutter or two knives until the mixture looks like coarse cornmeal. Add the milk mixture and stir with a fork or spoon, kneading until smooth like children's play clay.

To make a gingerbread men about 4 inches high, break off a piece of dough a little larger than a golf ball. Place it on your work surface and roll it lightly under your palms to form a pencil-thin rope of dough about 12 inches long. Break off a piece about 4 inches long and set aside. This will become the arms.

Fold the remaining rope in half to form a narrow, upside-down V. Grasp the folded top and pinch together one inch down from the top and twist to form the neck. Put the arm piece under the neck and place on the baking sheet.  Make the remaining men.

Bake until the cookies are lightly browned, about 15 to 20 minutes. Watch carefully as the sorghum or molasses in the dough can burn quickly.

Makes 18 gingerbread men 4-inches high.

Saturday, February 7, 2015

A Little Here. A Little There. Next Thing You Know, a Great Meal


Here at Potluck Paradise leftovers are our middle name.

We grew up watching our mothers take the last little bit of the Saturday roast beef, clamp the cast-iron food grinder on the edge of the kitchen table, and convert the un-chewable bits into tender minced meat. Next step--mix with leftover gravy, toss in some canned mushrooms and pour the mixture on a slice of white bread, or two.

If we were really lucky, there were leftover mashed potatoes. Those got mixed with an egg, or two, and some flour and formed into pancakes. Browned in butter to crispy doneness sheltering warm mash, they were the perfect base for the beef.

Flash ahead to today where from time to time we find ourselves looking at impossibly small bits of leftovers. A drib of soup, a drab of mixed vegetable. And, not having a dog, or even a cat, the thought can be, "Oh well. it's is just a little, let's toss it." I'm not going to lecture us on the amount of food wasted in the United States, or in other countries. We all know it is a serious problem.

But not so fast.  There are simple solutions if we just take a minute to consider proactively. That soup can help mellow a sauce or gravy. The vegetables can be frozen and tossed into the next batch of soup. And the last cup of chili is the perfect filling for an acorn squash!

So there's not real recipe this blog. Just a consideration.  Look at those leftovers and be thankful for the refrigerator with a large freezer so they can be set aside and, in effect, be harvested for another meal. Put the small bits into a special spot in the freezer so they are readily at hand. I have a large plastic food container in the door shelf and that's where the carefully labeled and securely wrapped bits are stored. Then think creatively. How can these be combined?  Even a mere tablespoon of mashed potatoes can be set aside to thicken a white sauce to creamy goodness. The last quarter of a cup of mashed sweet potatoes ended up in the chili above. Chili itself can be home for the last bits of the Saturday pot roast or the Sunday chicken.

In short, they're not leftovers, they're ingredients!

Copyright 2015 Rae Katherine Eighmey. All rights reserved.

Friday, February 6, 2015

Healthy, Fruit-Filled Chocolates Easily Made with Love and Honey


Sure the fancy heart-shaped boxes are nice, but why buy chocolates for your Valentine when you can make these delicious treats filled with healthful dried fruits and nuts. Here at Potluck Paradise headquarters, we're always ready to test chocolate recipes. These easy to make candies are at the top of our list. They taste like the richest bon-bons and no one will ever know the secret filling unless you spill the beans. The recipe dates from World War I when sugar was restricted to two tablespoons a day. Natural ingredients made these Honey Fruit Chocolates popular holiday gifts for Christmas 1917.

Make some for your special someone and watch him. . . or her. . . smile! The filling keeps frozen for weeks, ready to make a few more whenever you want a delicious little bite.

Honey Fruit Chocolates
1 12-ounce package raisins
1 8-ounce package whole, pitted dates
2/3 cup figs, diced
1 cup chopped walnuts or pecans
grated rind of half an orange
2 tablespoons orange juice
2 tablespoons honey
1/8 teaspoon salt
chocolate for dipping,
such as melted dark or semi-sweet chips
Run the fruit and nuts through an old-fashioned grinder, or pulse in
a food processor, until ground into a rough paste. Stir in rind, juice,
honey, and salt. Chill mixture until firm. Form into balls, about 3/4
inch in diameter. Melt chocolate chips and dip balls to enrobe
filling. Cool on waxed paper or foil. The filling can be frozen and
made into chocolates in batches. Makes about 6 dozen.
Copyright 2015 Rae Katherine Eighmey. All rights reserved

Thursday, February 5, 2015

Always Ready! with Rolls of Cookies in the Freezer


Here at Potluck Paradise headquarters we learned long ago--at our mother's apron strings-- that one of the keys to successfully surviving days with scores of children about is to have a freezer well stocked with rolls of slice and bake "icebox" cookies. Easy to make on demand by the handful, dozen, or cookie tin full for midnight snack, after school treat, or gift to a neighbor in need.

Our mothers and grandmothers knew how to make this work. Pick a day when you are in the kitchen anyway, cooking something that needs a constant eye, or in today's world, if there is something you want to watch on television and don't want to just sit there. Mix up and form the rolls. Wrap them securely--we've been using the "Press-n-seal" plastic wrap and then put them in s freezer bag. A small investment for a lot of easy pleasure.

If you have kids, or grandkids, around these are wonderful recipes to make with them.  I've cooked with our young grandsons. We all know how it goes. They can be all excited about the project, but after about five or ten minutes the lure of matchbox cars takes over. By dividing the project in half, you have the perfect project.  The Butterscotch in particular work with for making with kiddos -- Mix the dough with a spoon, or even with "perfectly clean" hands and then come back to it later.

Since we stared taking these to book talks we've found many a person had the same memories. And, they, like us, had not made these wonderful cookies in years. Post a picture of the Date Pinwheel and the "likes" will explode across Facebook. the chocolate spirals are fancy, but for flavor give me the Old Fashioned Butterscotch. We've shared that recipe in this community before but it is well worth repeating.


Classic 1950s Ice Box Cookies
(makes 8 dozen cookies -- but not all at the same time!)

2 cups brown sugar, firmly packed
1 cup melted butter
2 eggs, lightly beaten
1 teaspoon vanilla
1 teaspoon cream of tartar
1 teaspoon baking soda
4 cups flour
1 cup finely chopped walnuts or pecans (optional)

Stir the sugar, butter, eggs and vanilla together until completely blended. Add the dry ingredients, mixing thoroughly then stir in the nuts. Knead the dough with hands if necessary to get a smooth dough. Divide the dough into quarters. Form each roll into a log about one inch high and one inch wide. Wrap in plastic wrap and chill at least 2 hours in refrigerator. (You can firm dough more quickly in the freezer for about 20 minutes.)

When ready to bake, preheat oven to 375 degrees F. Grease baking sheets. Slice dough about one-eighth inch thick with a sharp knife. Place sliced on baking sheets, about 2 inches apart. Bake until lightly browned, about 10 to 12 minutes.  Makes 8 dozen -- but not, necessarily, at the same time.


Classic Date Pinwheels from the 1950s 

These Date Pinwheels can be a bit messy to make.  And be sure the dough is very, very cold when you slice them. But they are well worth the effort to have on hand in the freezer. If you want to be totally indulgent, frost them with a bit of burned butter icing--just a glaze.  Oh my!

Date-Filled Icebox Pinwheel Cookies

Filling:
1 pound pitted, dried,dates
1/2 cup white sugar
1/2 cup water

Cookie Dough
1 cup shortening or butter at room temperature
1 cup white sugar
1 cup brown sugar
3 eggs
1 teaspoon banilla
1 teaspoon baking soda
4 cups flour

First make the date filling. Cut the dates into small pieces. Combine with the sugar and water in a small saucepan and cook over medium heat, stirring occasionally, until the dates fall apart, making a jam-like mixture. (Note: if the dates are very dry, you might have to help them along with a few pulses from an immersion blender.) Set this mixture aside to cool while you make the dough.

In a large mixing bowl cream the butter and sugars. Stir in the vanilla and eggs, mixing well. Stir in the baking soda and flour.  To make the cookies--cover your work surface with waxed paper or plastic wrap. Divide the dough in half and roll out one half into a rectangle 1/4 inch thick. Carefully spread the half the cooled date jam over the cookie dough. Then, using the paper wrap as an aid, roll the dough up from the long side, making a spiral of date filling. Repeat with the other half of the dough and filling. Wrap this dough log in plastic wrap and chill for at least 2 hours. Store in the refrigerator for one week, or in the freezer for months.

When ready to bake, preheat the oven to 350 degrees F. Grease baking sheets. Cut across the roll in 1/4-inch thick slices with a very sharp knife. Place slices on the sheets and bake until golden brown, about 12 to 15 minutes.

Copyright 2105 Rae Katherine Eighmey. All rights reserved

Wednesday, February 4, 2015

Women's Heart Health Goes Red Deliciously


Hearts collide in February here at Potluck Paradise headquarters, No, we're not talking about lover's spats, we're celebrating the double-duty heart benefits of Valentine's Day celebrations and the American Heart Month promoting heart health especially among women. Well, what could be better to celebrate our Potluck Paradise National Potluck Month than a Red Dress -- Red Dinner. Although we're more likely to wear a red sweater and jeans.

Enough healthy red foods come to mind to easily fill a potluck table. Whole-wheat pasta tossed with tomatoes and red peppers, or in a red marinara sauce. Salmon is kind of red and then there is red snapper. We could even include some red meat -- a nice piece of lean steak -- smaller than a deck of cards, mind you -- with all the fat trimmed. Of course there are bushels of red vegetables! Tomatoes and red potatoes are too easy. What about red radishes in a non-fat dip, delicious red beets either simply roasted or slivered into a saucepan in the recipe below. Red cabbage is one our favorites. This recipe has all the flavor and hardly any fat. Just two tablespoons of butter for a whole head. 


WWI Victory Red Cabbage
4 cups thinly sliced red cabbage
2 tablespoons butter
1/2 teaspoon salt
1 tablespoon minced onion
1/16 teaspoon nutmeg
1/16 teaspoon cayenne pepper
2 tablespoons vinegar
1 1/2 teaspoons sugar
Soak the cabbage briefly in cold water. Melt the butter in a large frying pan. Add the onion and seasonings and cook until the onion is transparent, stirring frequently. Drain the cabbage and add to the frying pan carefully as the water clinging to the shreds will tend to spatter. Cover and cook over low heat until the cabbage is tender, about 10 to 15 minutes, stirring from time to time. Remove lid, add the vinegar and sugar, stir well and cook for 5 more minutes.

This is a quick and delicious way to prepare beets. It is a little messy to peel and then slice the raw beets. But the flavor is well worth it. Cooking time will vary depending on thickness of slices and how young, or old, the beets are. 
Luscious Steamed Red Beets
3 to 4 red beets
4 large lettuce leaves
grated peel from one orange
Peel the beets and slice very thinly on a vegetable slicer -- about 1/16 to 1/8 of an inch. Take a heavy bottomed 2-to 3-quart saucepan with a lid. Put about a half inch of water in the pan. Put in two lettuce leaves and then put in the beet slices, sprinkling them with orange rind as you fill the pot. Put remaining two lettuce leaves on top. Cook over low heat until the beets are tender, about 15 minutes. Watch carefully so that the water does not completely evaporate! You can eat or discard the lettuce.

And now for dessert!

We're skipping the red velvet cake or chocolate dipped strawberries and suggesting red pears with raspberry sorbet and maybe just a drizzle of dark chocolate. Use the pears just as they are, or poach in a light syrup. You could even use canned pears if you are in a rush. If you do use raw pears, toss them with a bit of lemon juice after you cut them so they don't turn brown as quickly.

Hearty Cornmeal Waffles Stretch Leftovers Deliciously


Here at Potluck Paradise headquarters getting the most from our food dollars is an essential. Good use of leftovers is key to that success.  Now anyone can toss the bits of meat and vegetables into a sauce, add some noodles as the "fill them up" starch and a buttered crumb topping and... Ta-DA -- casserole that elevates the humblest bits into a casserole fit for tasty mealtime--call it a hot dish if you live in Minnesota--but that's a saga for another time.

We've learned, however, that families thrive on variety. And not all meats, especially those with a distinctively tasty sauce do well combined with cream sauce.  A childhood memory got us thinking about new ways to combine leftover meats and a tasty starch. When we were kids our mothers sometimes brought the waffle iron into the dining room. Set it up on a tv tray and made waffles to order for dinner. We ate them the standard way with maple syrup and butter. Looking back, I suspect we did it at the end of the month when money was tight.

Recently, waffles and fried chicken have become a popular food combination on food shows, restaurants, and even some fast food places.

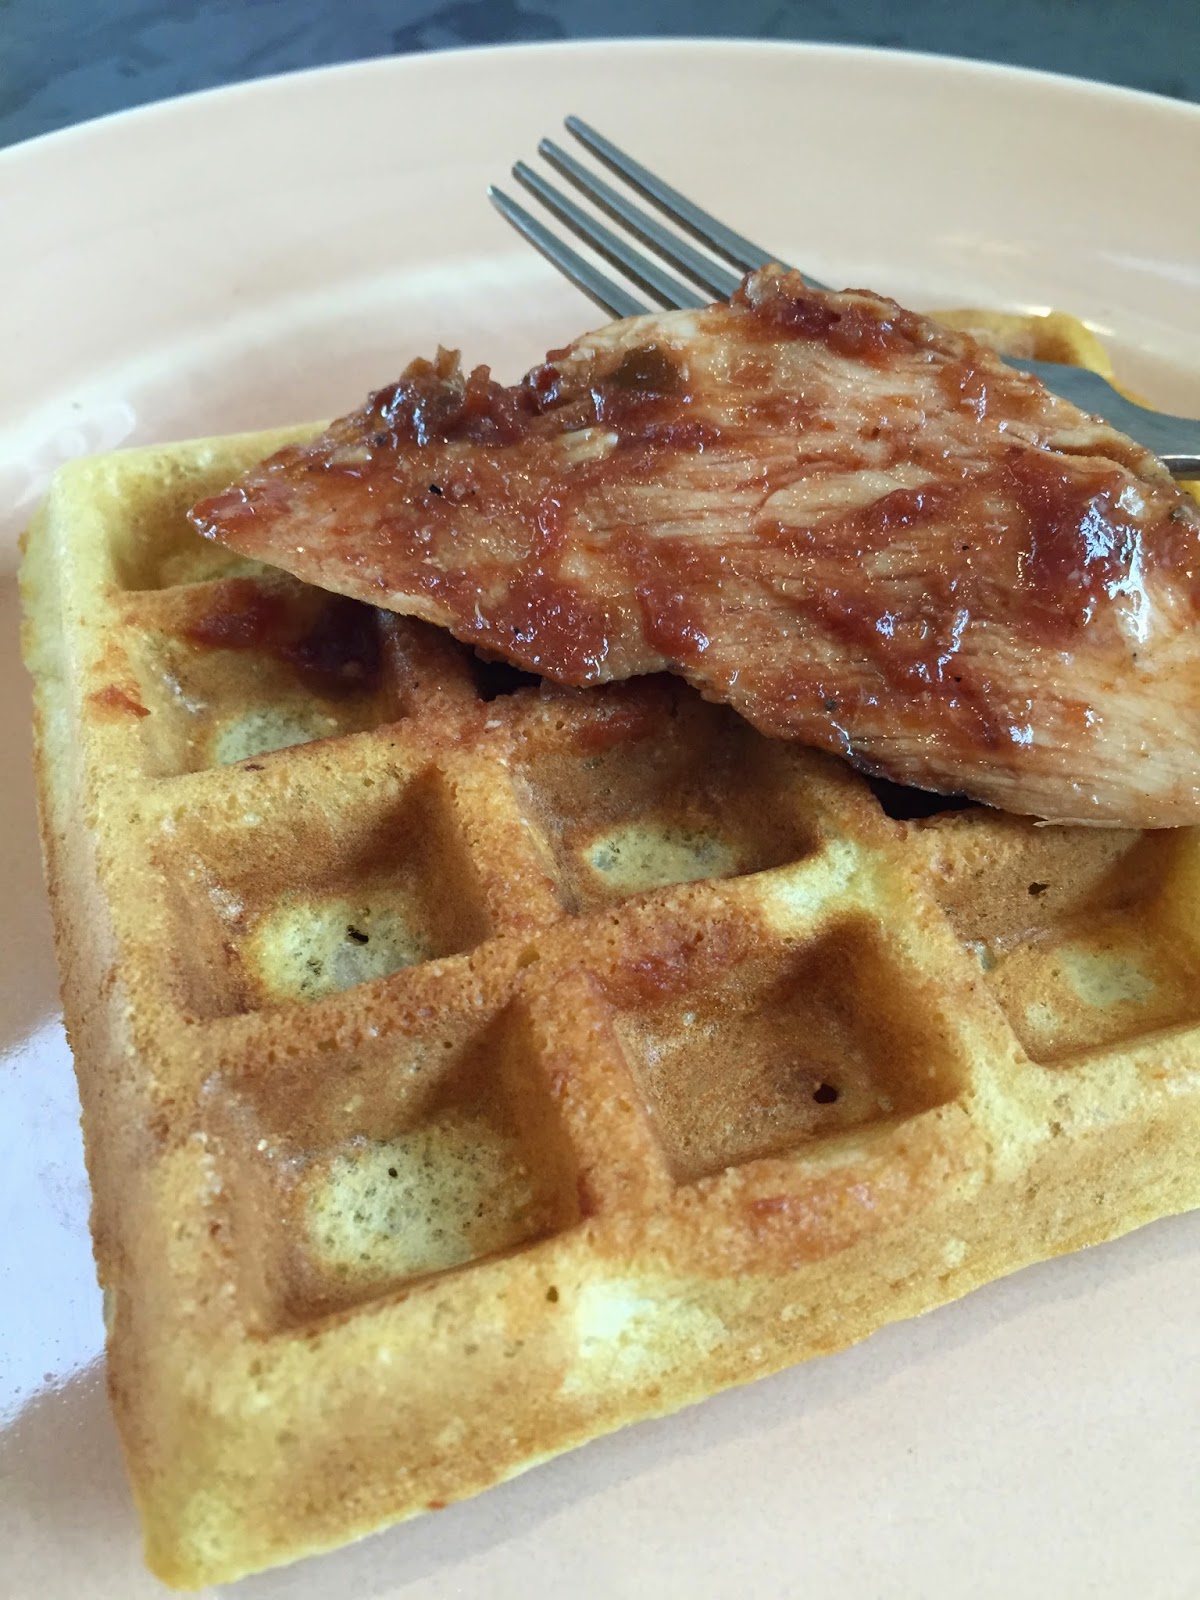
Sorry, but those ordinary waffles don't stand up to the ones we make here in the Potluck Paradise kitchens. Since we discovered these hearty cornmeal waffles from World War I wheat-stretching days, they are the only kind we make for breakfast AND as a superb base for leftover barbecued chicken. They are leavened with sour milk and baking soda, creating a light, and yet sturdy, treat.

The hearty rice and cornmeal texture is the tasty counterpoint to savory toppings. We're suggesting leftover barbecued chicken here, but they work equally well with creamed chicken, vegetables in cheese sauce, or even pork or beef stew. The pockets nicely hold sauces in place so you get deliciousness in every bite. The platform really makes the leftover bits of meat or vegetables go a long way to satisfy a hungry family.

Oh, yes.  They are tasty for breakfast as well. We frequently make a double batch and freeze the waffle squares. They toast up perfectly in the toaster. Just put it on low and toast them twice flipping them over in between.

Tasty World War I Rice and Cornmeal Waffles 

1 tablespoon vinegar
1 cup milk
1 cup cooked rice, cooled -- we prefer brown rice or even wild rice. White rice will work, just don't use the instant kind
1/2 cup cornmeal
1/2 cup flour
1 teaspoon baking soda
1/4 teaspoon salt, optional
1 tablespoon melted butter
2 large eggs, lightly beaten

Preheat your waffle iron. Put the vinegar in a glass mixing cup and add milk to the one-cup mark. Stir and set aside for about five minutes as it sours. In a medium mixing bowl combine the rice, cornmeal, flour, baking soda and salt if you are using it. Stir in the sour milk, mixing well to break up any lumps of rice. Stir in the melted butter and eggs. Cook waffles according to the directions of your waffle iron.

Makes about 6 4-inch "Belgian" waffle squares.

Copyright 2015 Rae Katherine Eighmey  All rights reserved

Tuesday, February 3, 2015

Preserve! Leftover Fruit

Cold and stormy winter days make us long for warm and delicious treats.  And one thing Potluck Paradise has taught us . . . adapting recipes can bring surprising deliciousness. Nothing proves this more than the Apple Preserve we developed for our book talk at the La Crescent Public Library. During our early summer tour through southwest Minnesota strawberry country, we demonstrated making 2 Ingredient, 2 Hour Strawberry Preserves. Now that we were heading into harvest and apple country, we wondered what would happen if we tried the same simple technique on apples.

Fabulous preserves!

Unexpectedly, but logically, the same preserving-sugar magic interaction that keeps strawberries whole, works with apple shreds. The resulting lusciousness is unlike anything we've ever had and is a new favorite. The McIntosh apples -- usually a variety that cooks into soft sauce, delicious spicy apple butter, or strains into clear jelly -- holds up perfectly. Pure sweet apple flavor, great on toast, yummy on ice cream or pound cake and wonderful on a ham sandwich.

It couldn't be easier. Or tastier. We gave a jar to a friend and her husband opened it. He said that it tasted like an unusually delicious honey, as he ate spoon after spoon. 

Amazing Apple Preserves

2 cups grated McIntosh apples
(grated on the large side of a box grater)
2 cups sugar

Mix apples and sugar and let stand for 2 hours or longer. Stir from time to time until sugar is dissolved. Put apples into a large saucepan, at least 3 quarts. Bring to a boil over medium heat. Lower heat and cook for 10 minutes, stirring from time to time. Store in refrigerator. Makes about 2 pints.  Store the finished preserves in the refrigerator for up to a month, or in the freezer for longer. 
NOTE: other varieties of apples may work just fine, but I have only tested this with the McIntosh and Gala, other apples should cook and preserve the same way. Worst case, you'll have a potluck preserve that resembles apple butter.  That's not terrible. 

Monday, February 2, 2015

February is National Potluck Month...Again


Start off National Potluck Month with 
Tasty "Top of my Head" Cornbread


Once again, we're declaring that February is National Potluck Month here at Potluck Paradise headquarters. It just seems so right to celebrate this shortest month where, at least in the northern states, the days get dramatically longer. What better way can there be to take joy in friends and family with homey foods that just bring people together. We're not ending this sentence with a question mark because the answer is obvious!

There are the February holidays, of course. The middle of the month is chock full -- Valentine's Day, Mardi Gras, Chinese New Year, and President's Day -- whew!  That will be some potluck!

This year we're also going to talk a bit about getting the most for your kitchen dollars. Yes, gas prices are down and we've not had to spend as much heating our homes as we did last year during the "polar vortex," but it never hurts to be penny wise and food-saving conscious.

We'll start the month off with a recipe we tossed together when we were in a rush, missing a starch to round out dinner, and couldn't find the exact recipe we remembered. This cornbread takes the best of a 19th-century version and makes it quick and delicious.  It is hardy and works nicely left over for breakfast, slightly warmed in a toaster oven or microwave with butter and maple syrup.

Top of My Head Cornbread

3/4 cup water
1/4 cup coarsely ground yellow cornmeal
1 cup regular cornmeal, white or yellow
1 teaspoon baking soda
1/2 cup flour
1 cup milk
2 eggs, lightly beaten

Preheat the oven to 400 degrees F. Lightly grease a glass baking pan about 7 x 11 inches. (Note other pans will work. Fill them only half full. Metal pans will bake faster)

Put the water in a small saucepan and bring to a simmer. Gradually stir in the 1/4 cup coarse cornmeal until well blended and smooth. Remove from heat and let stand about 5 minutes. In a medium mixing bowl, combine the regular cornmeal, baking soda and flour, mixing with a fork. Stir half the milk into the cooked cornmeal and then pour that mixture into the dry ingredients. Add the remaining milk and eggs. Mix well and spoon into the prepared baking pan.  Bake about 20 to 25 minutes until the cornbread just begins to pull away from the sides of the pan and a knife inserted into the middle comes out clean.  Delicious served with butter, honey, or preserves.


Copyright 2015 Rae Katherine Eighmey All rights reserved.